Posts in Category: Travel-Advice
Travel gadgets #1 – chargers and adapters
tldr; get a 4x USB travel adapter with folding US-plug and adapters for UK and europe-plugs. If you bring cameras with more than 1 battery, get a usb-charging-bay. If you bring a laptop, get an SKROSS universal adapter (for world trips) or buy an individual UK/US/EU-adapter if you only travel in 1 area.
When travelling, some gadgets might come in extremely handy.
Luckily we live in a world where most devices charge via USB and most cameras can be made to charge via USB with adapters. So here’s a short overview / suggestion, what to bring on your holiday.
Travel Adapters
Unfortunately, there is not 1 standard power-socket but ~4 sockets with different implementations, mostly used around the world. Some countries (especially in southeast-asian hostels) opt for power outlets that are already compatible with multiple plugs but being a european, the plugs with a safety-ground-connection (3 Pins / “Schuko”) might be a problem, although their number is decreasing in laptop chargers and mainly hairdryers and irons are the last remaining portable electronics requiring these huge plugs.
Warning: Using a 2 to 3 pin adapter could be extremely dangerous and (at least in germany), those are prohibited from being sold. Please refrain from using any cable-powered device without connecting the protection pin and use a proper adapter for these purposes!.
When buying one of these, make sure they have a replaceable fuse and bring a spare (the fuses will most likely blow if you use a hairdryer or an iron – trust me, this happened 
Devices in need of power
| Smartphone & Tablet | USB (micro / C / lightning) | |
| Laptop | power-socket or USB-C PD (if new) | socket adapter needed! |
| Actioncamera | USB (micro / C ) | optional multi battery-charger |
| Old camera | battery charger | USB-battery charger! |
| New camera (e.g. Sony Alpha 6000) | USB (micro / C ) | optional multi-battery USB-charger |
| Noise cancelling or bluetooth headphones | USB (micro) | |
| Flashlight | single-use batteries / lithium battery | USB Adapter usually included |
So most newer devices can already be charged via USB and for most cameras, there are small USB-battery-charging bays availible as shown below. To account for the unexpected awesome adventures, I’d always prioritise a charger over a 3rd or 4th battery for my camera.
Besides the charger that came with your phone, there are also many capable multi-USB-chargers with different features – here’s what you should look for:
- 2.1A or more per port; total power should be “number of ports you need*2.1A” – on remote islands, there might only be power for ~2 hours per day and you want to refill your powerbank, camera and phone fast!
- if your phone has QuickCharge (2,3) from Qualcomm, check for QC2 or 3 qualified chargers
- if your phone/GoPro has USB-C (usually paired with quickcharge) get a charger with USB-C according to your phones’ quick charge capability:
- QC2 / 3 Phones –> Qualcomm Quick charge capability
- Huawei (e.g. P10 / Mate 10) –> check the comments and questions on amazon to see if Huawei quick charge is implemented. Some USB-PD certified chargers might work
- OnePlus – sorry, I don’t think there are multi-usb-chargers with this capability
- USB-PD (also for some macbooks) get a powerful (18W or more) USB-PD charger
- small size and low weight with enough power
- rounded edges, preferably plastic case
- preferably a folding US-plug with clip-on adapters for other countries
- check user recommendations for ‘whining’ or ‘beeping’ or ‘humming’ or ‘noise’ in general. some chargers create an annoying noise, especially when plugged in without charging or when batteries are full.
- user recommendations with 1 star on amazon are always worth a read and might warn you of bad quality
Here’s what I’m currently bringing on most trips:
Travel gadgets #2 – powerbanks
tldr; get a light 10.000mAh powerbank with 2A charging capability, included micro USB cable and an additional USB output.
When travelling, you need to bring a powerbank. You’ll probably use it before you even arrive since constantly being on your phone while waiting in an airport drains the battery really fast.
There are thousands of power banks out there ranging from 1 to ~8 charges for your phone with different features like fast charging (output and/or input), an LED-light or solar-cells – and a thousand tests that mostly ignore some of the following points. Here’s my suggestion on what to get for travelling:
- ignore the solar cells. They charge extremely slow and when you’re more than 3 nights away from any charging port, you should be enjoying nature instead of netflix anyway.
- capacity: 8.000-12.000 mAh. Smaller ones are only good for 1 charge; bigger ones get bulky and you’ll almost never need them
- included native cable for your phone (micro USB / USB C / lightning) – saves space and is really convenient; though it won’t last forever.
- at least 1 additional USB port (for a 2nd device or when your included cable’s plug gets worn after a few years)
- >2A output (if you have a USB-PD or quickcharge phone, get one with the same capability)
- >2A charging of the powerbank itself (if you have a USB-PD or Quickcharge charger, get a powerbank that supports this as well, e.g. with USB-C. Lighting inputs aren’t useful since you could still use your apple charger with a micro usb or usb-c cable)
- plastic case, preferably with a soft-pouch/bag to avoid scratches on other devices and safe weight
- make sure to read the 1 star recommendations to look for manufacturing problems or possibly burned(dangerous) powerbanks
Remeber that if your phone has a 3000mAh Battery, a 10.000mAh charger is most likely only able to recharge it ~2.5 times. That’s not because anyone is bad at math but because the energy gets converted from 3.7 to 5V and back – and you’ll probably keep your phone turned on while charging so it’ll burn through some battery already. Depending on how good your powerbank is, 0,85*0,85 up to 0,95*0,95 (72-90%) of your powerbanks capacity will end up in your phone.
In terms of technologies for the batteries, there are basically 2: round cells and puch-cells. Round-cells are used in e.g. many anker powerbanks and industry wide in a format called 18650 (18mm diameter, 65mm length). There are some manufacturers who use premium cells which are really sturdy and safe. The downside is the weight and wasted space between the round cells, as well as the thickness of at least 20mm (18+cover). Pouch-cells are flat (like the one inside your phone), lighter and more compact but you should make sure not to bend or try to break your powerbank.
For a powerbank that is ready for your next phone, I’d suggest USB-C input and output with USB-PD for charging the powerbank and the acessories you plug in
The L(/R)ight Backpack
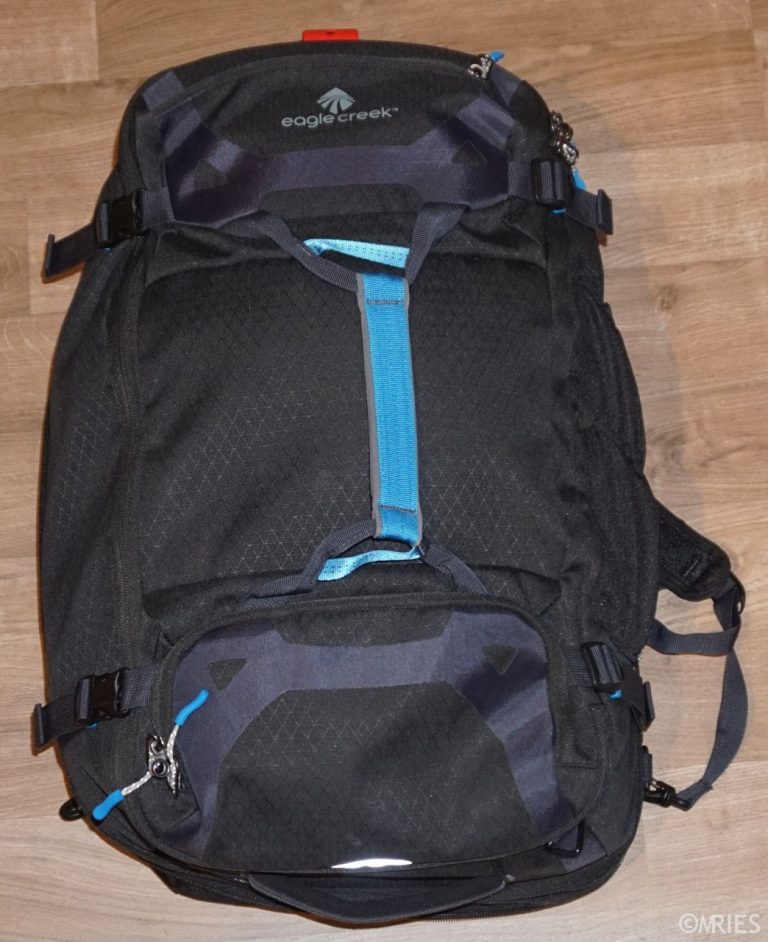
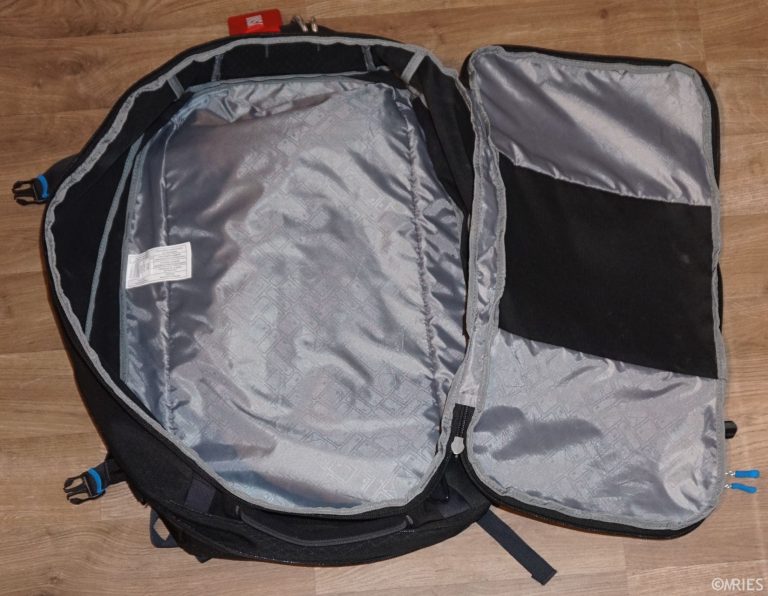
tldr; if you want a light, durable handluggage backpack, try the eagle creek load hauler extendable (not for hiking long distances!)
 |
 |
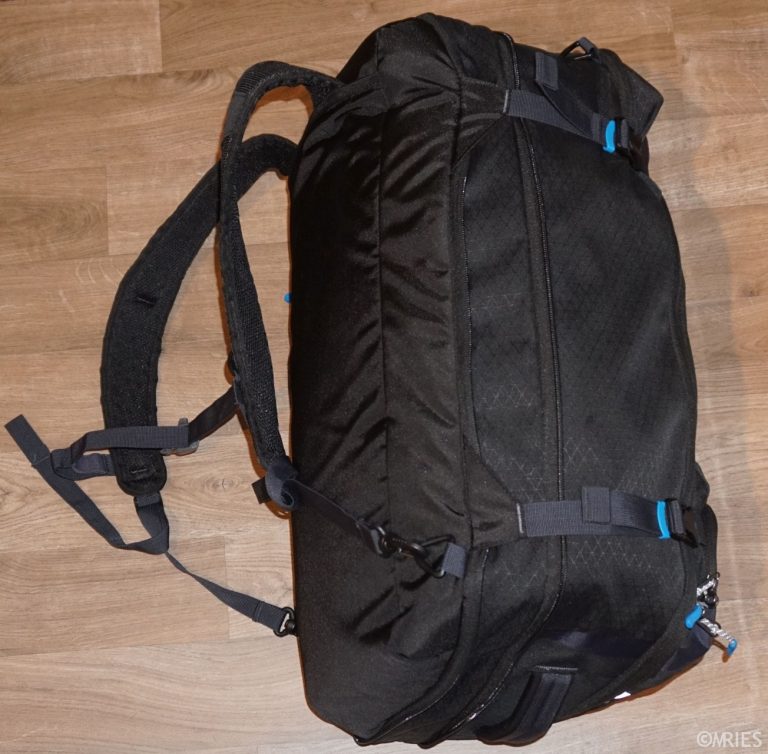 |
 Some years ago, I decided to travel handluggage only as much as possible. The last time, I’ve packed a ‘real’ bag was for my south-america trip in 2015 which involved multiple climate zones and hiking the inka trail. Usually, a cabin-sized backpack works great for weekend trips and offers enough space for ~1 week worth of clothes in a tropical climate. Since washing is extremely affordable in asia & southern america and availible almost everywhere, this is sufficient for multi-week trips as well. The remaining problem is the weight – some airlines restrict hand luggage to 7kg. A bag with less than 7Kg is hard to achieve when taking gadgets like a system-camera, a 2nd lens, a powerbank or an underwater camera with you, especially when the bag itself weighs in at 1.5Kg. Some years ago, I decided to travel handluggage only as much as possible. The last time, I’ve packed a ‘real’ bag was for my south-america trip in 2015 which involved multiple climate zones and hiking the inka trail. Usually, a cabin-sized backpack works great for weekend trips and offers enough space for ~1 week worth of clothes in a tropical climate. Since washing is extremely affordable in asia & southern america and availible almost everywhere, this is sufficient for multi-week trips as well. The remaining problem is the weight – some airlines restrict hand luggage to 7kg. A bag with less than 7Kg is hard to achieve when taking gadgets like a system-camera, a 2nd lens, a powerbank or an underwater camera with you, especially when the bag itself weighs in at 1.5Kg.
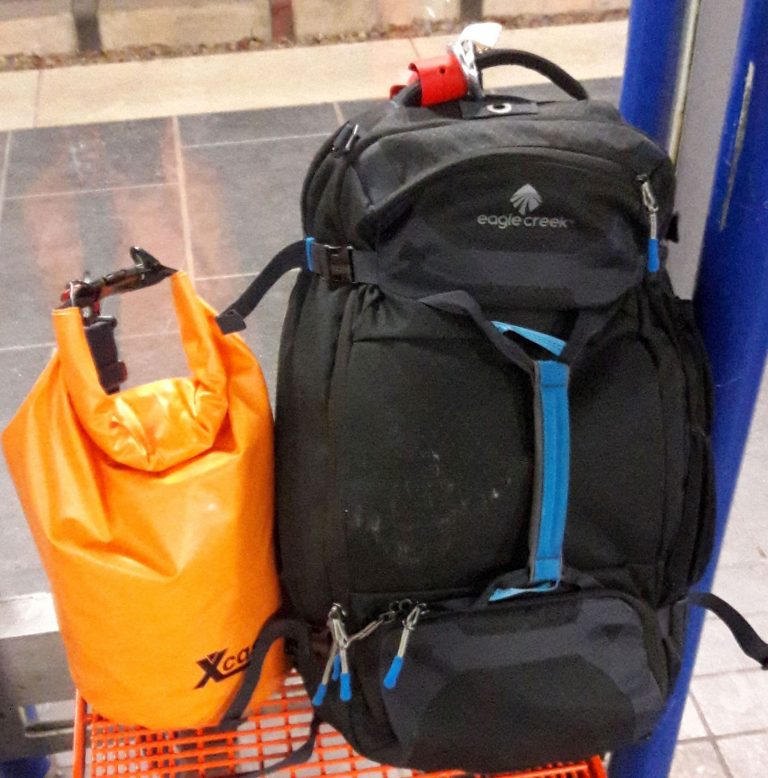
The loophole: Most airlines allow for a ‘personal item’ besides the cabin bag which is even less likely to be weighed than your hand luggage. Some don’t mention it on their website, but so far none complained. I use a 20L waterproof roll-top dry-bag as ‘personal item’. This will be the daypack which is perfect when near the water or on a boat to safeguard your electronics. During the flight, it holds heavy electronics/batteries and what you might need during the flight (earplugs, inflatable neck pillow, ebook-reader..). This picture shows the waterproof bag and my Kestrel packed for a 2.5 week thailand trip. Although my backpack has never been weighed, I decided to swap my Jack Wolfskin backpack for a lighter alternative. |
So here’s a small guide on cabin-sized backpacks:
Wishlist:
- Cabin sized
- extendable to accomodate the jeans and sweater necessary for flights when travelling on the ground.
- as light as possible
- durable
- flexible carrying options as backpack or duffle bag
- opens like a suitcase for easy access
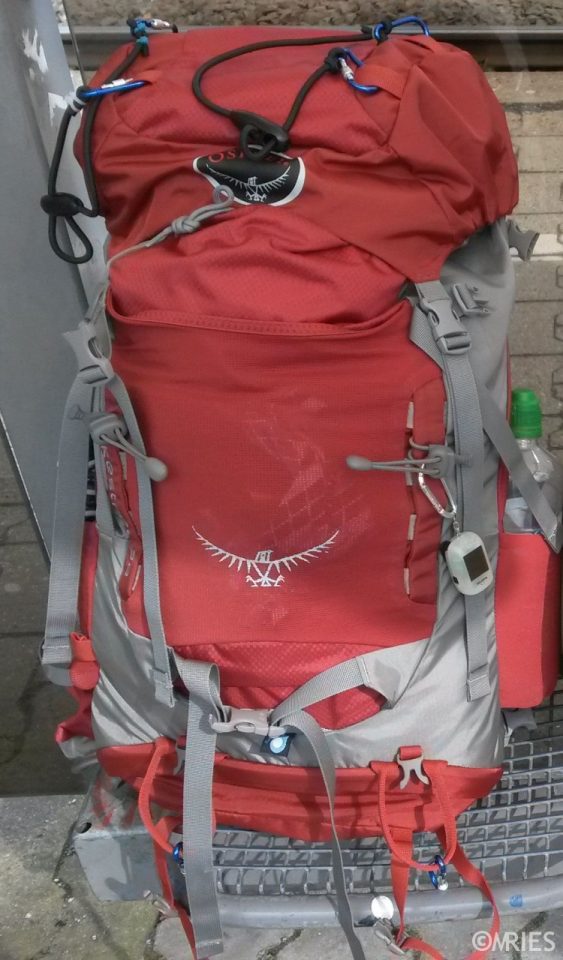
Starting Point: Bags I used previously:
 |
 |
| Jack Wolfskin Getaway 40L (discontinued): + cabin sized + opens like a suitcase + laptop-sleeve included + multiple carrying Options – ~1.5Kg, with Laptop sleeve removed still 1.3kg |
Osprey kestrel 38 38L, 2014/15 Model. + cabin sized + great back ventilation + superior carrying system and weight distribution – only top-flap access (the new model also offers an additional zipper for the main compartment) – back-ventilation consumes space – ~1.4Kg |
Every travel-blogger tends to recommend the osprey farpoint 40 – which is a great backpack but weighs ~ 1.4Kg. Some tell you about ‘hybrid backpacks’ which have wheels like a trolly – they usually weigh around 2.5Kg or more. Since the desired bag will only be used to get from the airport, ferry or bus to the hostel/accomodation, and not for hiking, carrying time is limited.
To lower the weight, I was willing to make some compromises:
- padded compartment: I don’t always take a laptop and If I do, I can put it in a sleeve before packing -> drop the padded laptop compartment
- suspension system: when not hiking, the suspension system doesn’t need to be perfect. To walk 1-2km per day in Airports or from the ferry to the hotel, padded backpack-straps should suffice for 7Kg.
- hard PU/wire frame: light backpacks don’t maintain their rectangular shape when empty. That’s ok, as long compressions straps allow it to stay in shape when almost full.
I’ve searched the websites of most outdoor-equipment manufacturers, stores, amazon and local stores and realized, light backpacks are hard to find. There is the ‘Cabin Max’ series on amazon which is quite lightweight but some recommendations are devastating (ripped seams/fabric during 1st trip). Then there’s Minaal – a Kickstarter/indiegogo funded ‘perfect travel bag’ which is quite expensive (250$+) and some other premium 200$+ backpacks from e.g. Vaude but a low weight never seems to be the focus. Thanks to some american backpack store, I ended up on the eagle creek website. And they offered what I was looking for!
I bought the eagle creek load hauler extendable via Amazon.de (it didn’t show up initially due to incomplete data on the product page).
- + extremely light
- + durable despite fragile looking fabric
- – no bottle-compartment -> I’ll add this myself =)
I’ve used it for my latest trip to Thailand, Komodo and Malaysia and it was the most versatile backpack I’ve used so far. Durable, light, offered plenty of space and makes it easy to find whatever you want to get out. The only thing I missed was the bottle-holder (which my mother was able to add by using the sewing machine when I was home over christmas (I’ve never used the machine before and she was happy to help me 
And a table with the facts on these 3 and additionally the smaller eagle creek expanse hauler and the famous farpoint 40.
| eagle creek Expanse Hauler |
eagle creek Load Hauler extendable |
Jack Wolfskin Getaway |
Osprey Kestrel 38 M/L |
Osprey Farpoint 40 M/L |
|
|---|---|---|---|---|---|
| price ~ | 109$ | 129$ | discontinued; was 100€ | 105€ | 100€ |
| Volume | 50 L | 49 L / 57 L | 32 L | 38 L | 40 L |
| Weight | 950 g | 830 g | 1430 g | 1420 g | 1320 g |
| Height [cm] | 56 | 56 | 55 | 71 (can be squeezed to 56) | 54 |
| Width [cm] | 35.5 | 36 | 36 | 38 | 35 |
| Thickness [cm] | 23 | 23.5 / 28 (extended) | 27 | 40 | 23 |
| Extendable? | – | + 5 cm main compartment | – | – | – |
| Opens like a suitcase | x | x | x | – | – |
| 2nd inner compartment | x | – | x | x boden | – |
| small compartments | 1 | 2 | 1 + organizer | 1 top + net | x |
| Padded compartment (Laptop/tablet) | – | – | x | – | x |
| Compression straps | x | x | x | x | x |
| Frame/stability | – | – | foam | PU-plate | foam |
| Backpack-mode | x | x | x | comfy (vented back + hipbelt) | comfy (vented back + hipbelt) |
| Duffle/Messenger-bag mode | x | x | x | – | x |
| Bottle-compartment | – | added ^^ | x | x | x |
Traveling – Tips
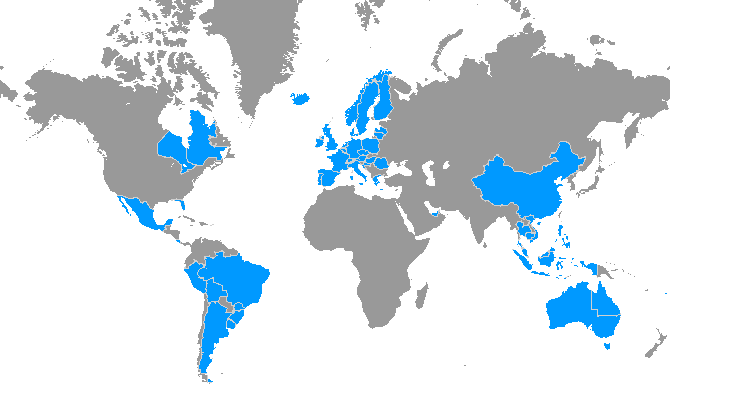
So far I’ve mainly posted pictures from places I’ve been to since 2014. Before that, I traveled mainly around Europe but since I was in Singapore in 2014, I started exploring the rest of the world.
Here, I’d like to give some advice on traveling – in general, in Europe and around the world. – breaking with the tradition of posting mainly photos.
Cities in Europe:
Europe offers many diverse and beautiful cities, most of which have quite a history and offer an ancient area with beautiful old architecture, heritage sites (and sights) and ruins.
Unlike mega-cities such as Dubai oder Kuala Lumpur, most european capitals have been around and growing for hundreds of years. Some were founded by Romans, like most italian cities and e.g. Trier in Germany; my hometown. These cities look back at roughly 2000 years of history, devastating wars and fires, growth and change. You’ll find ruins and churches from different epochs and distinctive areas/blocks that were built in a certain periods and offer diverse styles. Most cities still preserve the old town and city-life revolves around the marketplace / piazza del popolo. Where (asian) mega-cities impress with their skyline at night, european cities amaze with their diverse buildings and offer a ‘window in time’.
Planning the trip:
- When flying, take note which Airport you’re flying into. Some are located quite far away and fast transfer to the city can be pricey, especially during night hours. Cabs in Europe aren’t as cheap as they come in Asia – using uber might save you some money but I’d advise to stick to public transport as much as possible.
- Try to find an accommodation near the center or with good public transport Connections (subway station within 500m)
- Book a hostel rather than a hotel to get to know others; explore the city together and get tips on what to see.
- When traveling by bus: there rarely are semi-cama (comfy reclining seats) or cama (wide comfy seats with curtains around) bus-options in Europe so don’t expect them to be too comfy.
European cities are best explored by foot and it’s always a good idea to try to get a bird’s-eye view from a hill, a TV-tower (or a rooftop bar=) ). For the first day, I can highly recommend the ‘free’ walking tours offered via ‘sandemanns new Europe tours’. These tours exist in many cities and usually start around 11 near the main square / city center. Unless you’re a huge group, booking isn’t required and you can just show up and look for the guides in red shirts. These guides are mainly history or art students (I’ve also met engineers and teachers) who love their cities, know a lot about it and got certified as a guide. Since their only payment is the tip at the end of the trip, they are enthusiastic and try to give you the best experience they can. Feel free to ask them whatever you’re interested in; there’s a high chance they can recommend a place to go to. The tours usually take around 3 hours and finish at a bar with a special offer. In some cities, they also organise pub crawls in the evening. – Please remember to tip the guides according to your liking so they can keep the service running and others get the same chance to enjoy these tours.
I’ve done this free walking tour in Amsterdam, Berlin, Dublin, Edinburgh, London, Madrid, Munich, Rome and Prague. There might be other companies or freelancers offering free Walking tours – which might be great as well or even better – just give them a try.
When in Germany; take note:
- not everybody understands English: (In my opinion, the all-dubbed-TV is the reason why especially the ‘older generation’ lacks English vocabulary unless they need it professionally).
- public transport; especially the ‘Deutsche Bahn’ is complicated and expensive. Ask a local if you’re uncertain what to book.
- Taxis are really expensive – stick to public Transport.
- Shops are closed on Sundays. Except for ~5 Sundays/year (differs year to year and citywise), all stores are closed on Sundays. Only restaurants and gas stations will be open.
- free WiFi is scarce!
- try typical German bread: it’s the best in the world.
(more country specific advice will follow)
